
Showing posts with label Vegetarian. Show all posts
Showing posts with label Vegetarian. Show all posts

1 onion chopped
3 chillis
1tbs ginger garlic paste
4 small brinjal quartered
1/2 tsp turmeric
1 tsp garam masala
One tiny bunch coriander chopped
2 tsp curd
1/2 lime squeezed
150g rice
210ml water
Oil & salt
Soak rice for 20 mins drain. Do the prep meanwhile
Use cooker
Saute onions and green chillies in oil still onion becomes translucent.
Add gg paste, stir and leave till the raw smell goes off
Add turmeric and masala. Stir.
Add brinjal, curd, coriander, lime juice. Stir. Do not cook brinjal further
Add rice and stir. Top with water. Adjust Salt
Cover the cooker without the whistle till steam comes out. Place whistle turn off heat and let it cook in the steam inside about 10 mins or till steam goes off.
Eggplant Biryani/Pulao
It seems like ages since I've updated this blog. Oh wait! It's actually been ages. Over two months and not an entry. Seems a little strange. It's not like I've not been cooking; I've been cooking like a maniac some days. It's not like I didn't have time; I've been a sloth quite a few of those days. It's just, you know, just not been going right. Just when I think, I have life figured out, I have something new to look forward to, it all seems to come crashing down. So much so, I don't think I should think so much anymore


I've been making this so often, but forget to take a picture every time. Yesterday for some reason, I got confused with the order quantities and had a ton leftover which I boxed up and gave to my sister in law. I also got her to model for me when she came over. Not an easy task with two rowdy boys, one who wanted the phone and the other who just want to go home or get banana chips!
This is actually the easiest thing to make. If you're from south of the Vindhyas you probably make Lemon Rice, this is just savvying it up using rice noodles instead of rice. I'm going to go ahead and call this Lemon Rice Noodles though in fact I'm actually using limes. Just the way it's been called so far and I'm no path-breaking trendsetter here.
Ingredients
Rice Noodles - 200g pack
Water to cook the noodles
1 tbsp - sunflower oil
1 tsp - mustard seeds
3 - green chillis split long
1 - sprig curry leaf
1/2 tsp - turmeric powder
Juice of 3 limes
Salt to taste
Method
1. Cook rice noodles till al dente. Follow instructions on the pack. Do not let it turn to mush.
2. Drain & run cooked noodles under cold water to stop cooking. Further drain in colander
3. In a wok, heat the oil and temper mustard seeds
4. Add green chillis & curry leaves to the temper. Stir around till the raw taste goes off. Take care to ensure the curry leaves don't burn.
5. Briefly take the wok off heat and add turmeric, back on heat and stir with the chillis and curry leaves. Again, take care the turmeric doesnt burn.
6. Take the wok off heat and add the drained and cooled noodles.
7. Sprinkle lime juice and salt over the noodles and toss to distribute evenly. (I used my hands to toss the noodles)
8. Place it back on heat and gently warm it through allowing the flavours to combine.
8. Et Voila! Lemon Rice Noodles ready.


If you follow me on Facebook, you'd know by now I contribute to a food app called TinyOwl in Bombay. Introduced by a couple of ex colleagues of mine, this app has been something that's been keeping me busy for the last couple of months. It started off slow, but has been building up pace. It is a place for me to try and figure out whether people actually enjoy the food I make. I can't say very convincingly it's all very smooth sailing, but some dishes fare better than others and this Lemon Rice Noodles is something which has received the most favourable comments so far. I usually serve this with a Ginger & Chilli yogurt based dip which goes really really well. It's not really necessary though. I love it just as it is.

I've been making this so often, but forget to take a picture every time. Yesterday for some reason, I got confused with the order quantities and had a ton leftover which I boxed up and gave to my sister in law. I also got her to model for me when she came over. Not an easy task with two rowdy boys, one who wanted the phone and the other who just want to go home or get banana chips!
This is actually the easiest thing to make. If you're from south of the Vindhyas you probably make Lemon Rice, this is just savvying it up using rice noodles instead of rice. I'm going to go ahead and call this Lemon Rice Noodles though in fact I'm actually using limes. Just the way it's been called so far and I'm no path-breaking trendsetter here.
Ingredients
Rice Noodles - 200g pack
Water to cook the noodles
1 tbsp - sunflower oil
1 tsp - mustard seeds
3 - green chillis split long
1 - sprig curry leaf
1/2 tsp - turmeric powder
Juice of 3 limes
Salt to taste
Method
1. Cook rice noodles till al dente. Follow instructions on the pack. Do not let it turn to mush.
2. Drain & run cooked noodles under cold water to stop cooking. Further drain in colander
3. In a wok, heat the oil and temper mustard seeds
4. Add green chillis & curry leaves to the temper. Stir around till the raw taste goes off. Take care to ensure the curry leaves don't burn.
5. Briefly take the wok off heat and add turmeric, back on heat and stir with the chillis and curry leaves. Again, take care the turmeric doesnt burn.
6. Take the wok off heat and add the drained and cooled noodles.
7. Sprinkle lime juice and salt over the noodles and toss to distribute evenly. (I used my hands to toss the noodles)
8. Place it back on heat and gently warm it through allowing the flavours to combine.
8. Et Voila! Lemon Rice Noodles ready.

Lemon Rice Noodles

If they have a word for beetroot in Malayalam, I don't know of it. When I was a kid and at home, Mum would make beetroot thoran, so would the chechis in the REC ladies hostel mess. Of course, mum's thoran is way way better than the chechis. In fact, there is no comparison. But the fact is, beetroot any which way always had my attention. Perhaps it is the colour, or maybe the natural sweetness it imparts to anything its cooked with, or maybe because my hands always looked so bloody and gory after I'd had it. haha... so many reasons to like beetroot.

You know how it is when you're a kid and you never bothered entering the kitchen. I never really had much of a clue about cooking vegetables, what they looked like, and in funny instances how to buy them. Like the time I went to the local store and asked for a quarter kilo of coriander leaves and the store guy looked at me strangely and asked 'ningalde veettil innenna sadya aano?' loosely translated to 'are you cooking a feast today in your house'. :D :D :D
So in the same way, I really didn't know that beetroots don't look as pretty on the outside as they do on the inside. That dirty looking brown thing certainly couldn't be my lovely beets could they? It took some amount of checking and scratching the surface to figure that yes underneath that dirty, grimy looking surface, lay this pretty coloured root. Makes you wonder, how did humans really come about eating all these things. Who would have thought to dig up some dirty spud from the ground, scratch the surface and say 'oh! this is edible. And tasty too!' It's a thought that always runs through my mind. Who found out all these things first. That if you cook meat, it tastes better. Did they discover it accidentally? Something we take so for granted these days. But who would have been there to show them otherwise?

This dish is best cooked and had fresh. Inspired by an episode on zucchini fritters I once saw on Nigella's show, I substituted with beets cos well, beets are easier to source, cheaper to buy and also something I like quite a bit. Beetroot and feta is always a nice combo, the sweetness of beets cut through by the saltiness of feta. I also had a greek yogurt / hung curd dip to accompany this. But seriously the fritters are delicious straight off the pan even without any accompaniments.

Ingredients
2 beets grated
1/2 cup chopped coriander
1 egg beaten
1/4 cup all purpose flour
50g feta crumbled
1/2 tsp salt
Olive oil to pan fry.
Method
Mix all the ingredients together. Season with salt.
In a non-stick pan over medium heat, drizzle oil just to coat the surface.
Drop spoonfuls of batter onto the pan. Do not overcrowd. Gently flatten with spatula.
Cook 3-4 minutes per side. Drain on paper towels.
Serve warm!
And not even the teeniest bit difficult to make! Makes me an even happier person.
*Generally for zucchini fritters, you drain the liquid from the zucchini by prepping it with salt a couple of hours. I did not do it for the beets. I like a little crunch on the beets. You could try doing it though. Do let me know how that works out for you.
** If you find the egg mix is not enough to bind the whole batter together, add a spot of cream, just enough to bring it all together.
Beetroot & Feta Fritters

What is comfort food to you? I can fairly say, to me, it is anything which has coconut milk as an ingredient. The flavours have become so ingrained to my senses, that anything which has coconut milk automatically reminds me of home and Kerala. And a vegetable stew is something made in homes across the length and breadth of the state. Besides the addition of an odd spice or a curry leaf here and there, I doubt it varies too much. Served with any kind of appams and bread, it makes its way to a breakfast table quite frequently.
Of late, I've been spending too much time at home. The excuse is I want time to think and clear my mind, which while true also leads to other consequences such as barely stepping out even for groceries. My excuse, it's too much effort in this heat to dress decently to go out and get groceries. I could always order them online you'd say, but then I'm a fan of the non digital and the touch and feel. Oh man! that probably made me sound like a chimpanzee in this tech age. But it is true, even though I know it's Danone yogurt I'm going to pick up and a bag of carrots are quite possibly the same everywhere, there is joy in going to the local grocery store and checking the product. Except not in this heat.
Last weekend, when I'd called my brother over for lunch, I made appams and beef curry. A beef curry which is so familiar to us, cos it's the one my mother made for us almost every Sunday back home. Normally I'm one for measuring out spices and powders and everything. This time, Jayashree looked at me in surprise when I started throwing in spices willy nilly. "Spoon! Spoon!' she kept saying and I kept ignoring her. It comes out right, no matter what I do. If there is one curry in the world I know I can twist and turn and still get right, it's that one. So I planned to make a veg version for you on this page, just so everyone could enjoy my favourite Sunday curry. Unfortunately, that is when I realised I dont have tomatoes in the house.
The good thing about this stew is that you barely need any fancy ingredients. It's all regular staple kitchen stuff. Onions, chills, ginger, garlic, whole spices, and veggies of your choice - potatoes, carrots & peas in this case. Sometimes we chuck the veggies and just add a couple of boiled eggs and then it becomes and egg curry. Any sturdy vegetable would do. You could make this a mutton stew by just adding mutton. There is one thing you need to make this stew a success though... and that is coconut milk. Freshly pressed coconut milk would be awesome. But who's got the time and energy for that these days and that too in tiny urban kitchens. I used a tetrapak this time. But I've also used those powdered versions and found it quite nice, though not exactly the flavours of fresh milk.
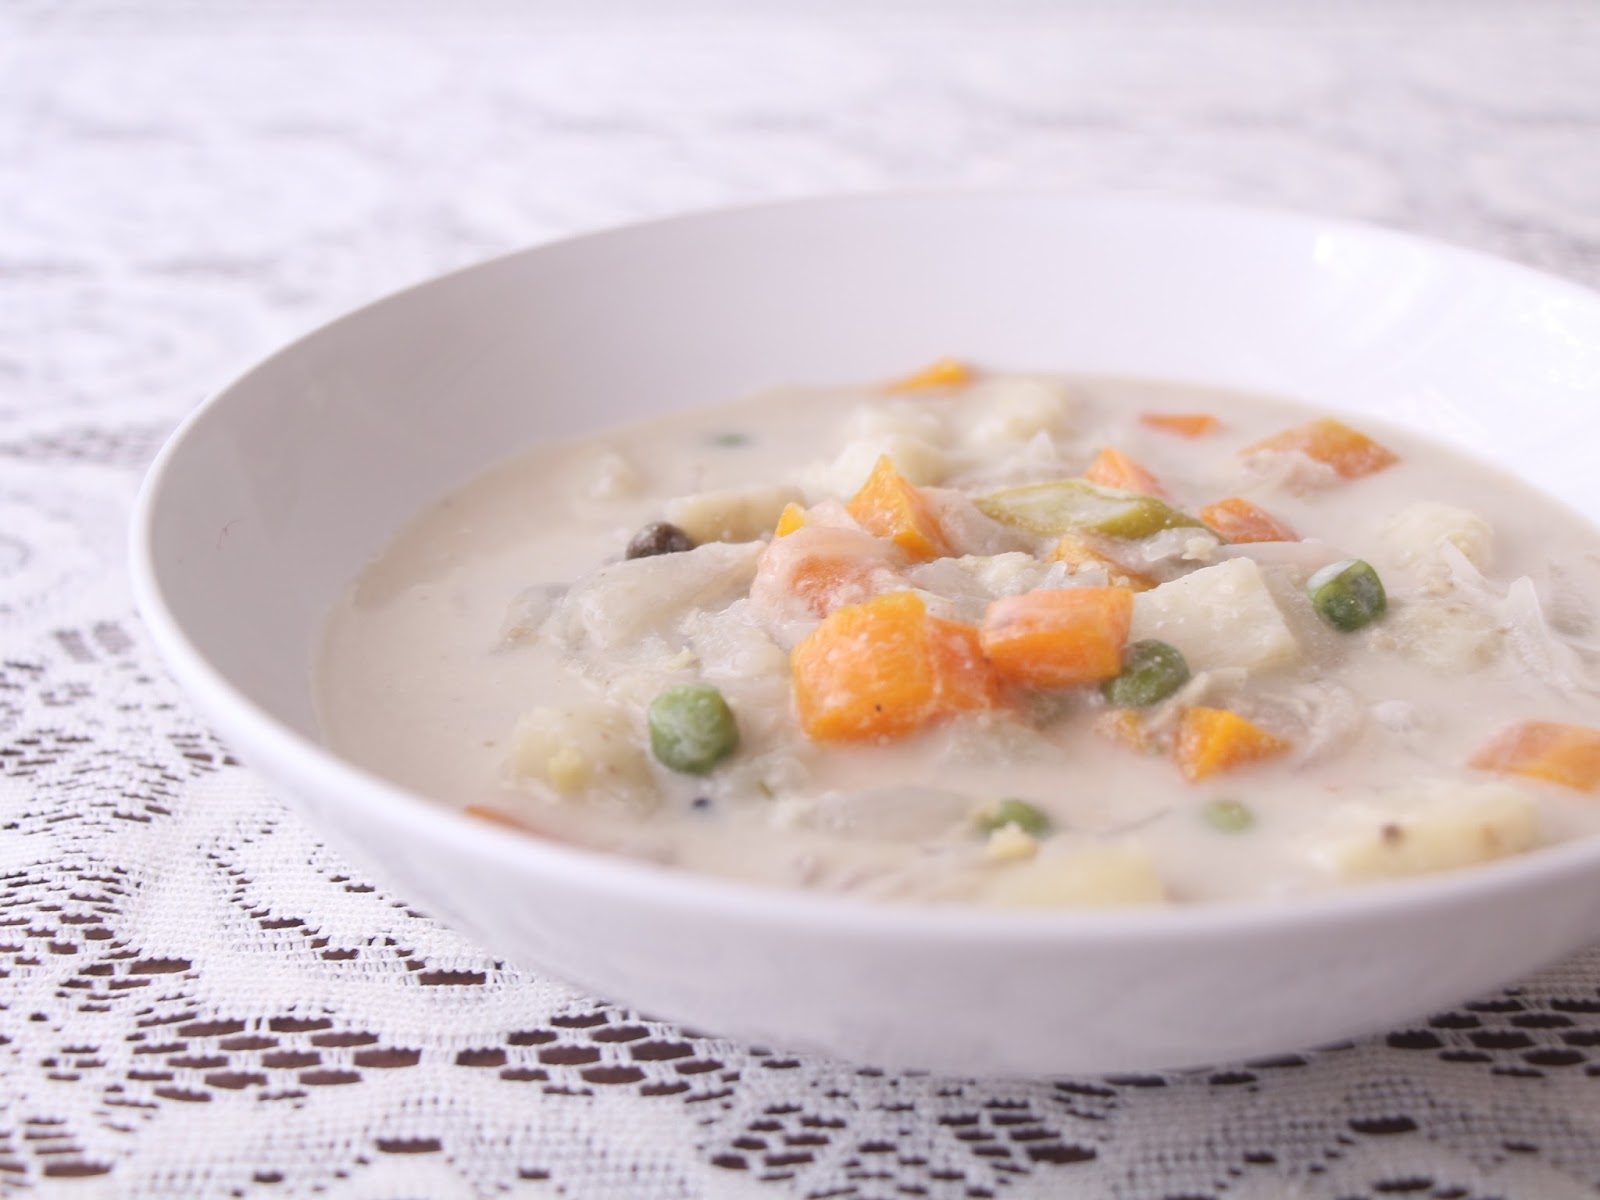
I have to tell you, when Jayashree saw me make this, she looked worried. It had no masalas, no tomato, what are you making was the unspoken question. Then she tasted it and said, ok, I'm making this at home for my kids. That's high praise indeed! :-)
Ingredients
2 tbsp coconut oil/refined oil
4 Cardamom pods whole
5 cloves
2 sticks cinnamon broken
2 onions thinly sliced
5 chillis sliced long
1 tbsp freshly ground ginger
1 tbsp freshly ground garlic
2 potatoes diced
3 carrots diced
1/2 cup peas
2 cups coconut milk/water
1/2 cup coconut cream (first press)
*1/2 tsp garam masala
Method
Heat oil in a wok (Malayalees use the wok quite a bit, we call it a 'Cheena chatti' or a Chinese pot)
Temper the whole spices to release their flavours.
Add sliced onions & chillis and gently sweat till the onions turn translucent.
Add ginger, garlic paste and cook till the raw flavour goes off.
Add in potatoes, carrots, peas and other veggies and stir to completely coat with the spices and other flavours.
Pour in water/coconut milk, cover and cook till the veggies are just done.
Add coconut cream and gently simmer for 2 mins without bringing to a boil.
Sprinkle garam masala on top just before serving.
*I sprinkle garam masala just after cooking and turning off the flame. Then I keep the dish covered till it's time to serve and the steam emanates the aroma of the spices when I open up the dish.
**My mum advises adding a spot of vinegar to bring in the sour flavour. I did not use it this time. I never have actually. Mum also says, the potatoes have a sourness of its own, which it lends to the dish.
The Quintessential Kerala Vegetable Stew

I know I've not been the biggest advocate for pasta. For the longest time I wondered what all the fuss was about. It was just pasta right? like carbs, like rice. It all depended on the sauce you added to it. So most times, I'd chuck the pasta and use other stuff instead with the sauce. Like when I made my Boozy Pasta Sauce. But over the last one year, I've been taking packed lunches to work and it made so much sense to make simple pasta dishes which would remain sturdy and fresh for lunch. I guess this one's more a salad than a saucy pasta. It takes hardly anytime to make and is not messy to pack and go. And also very good for summer when you don't want to be near a stove too long.
It is not advisable to wash cooked pasta when there is a sauce to bind the dish together. But in this case, since there is no sauce, I rinse the pasta in cold water just once to wash the excess starch away.
After all this, you must be thinking I've made some awesomely new, outlanding dish here, but read the title. It is not called 'My Simplest Pasta Recipe' without a reason. There is actually no recipe :-)
You only have to be careful with your ingredients.
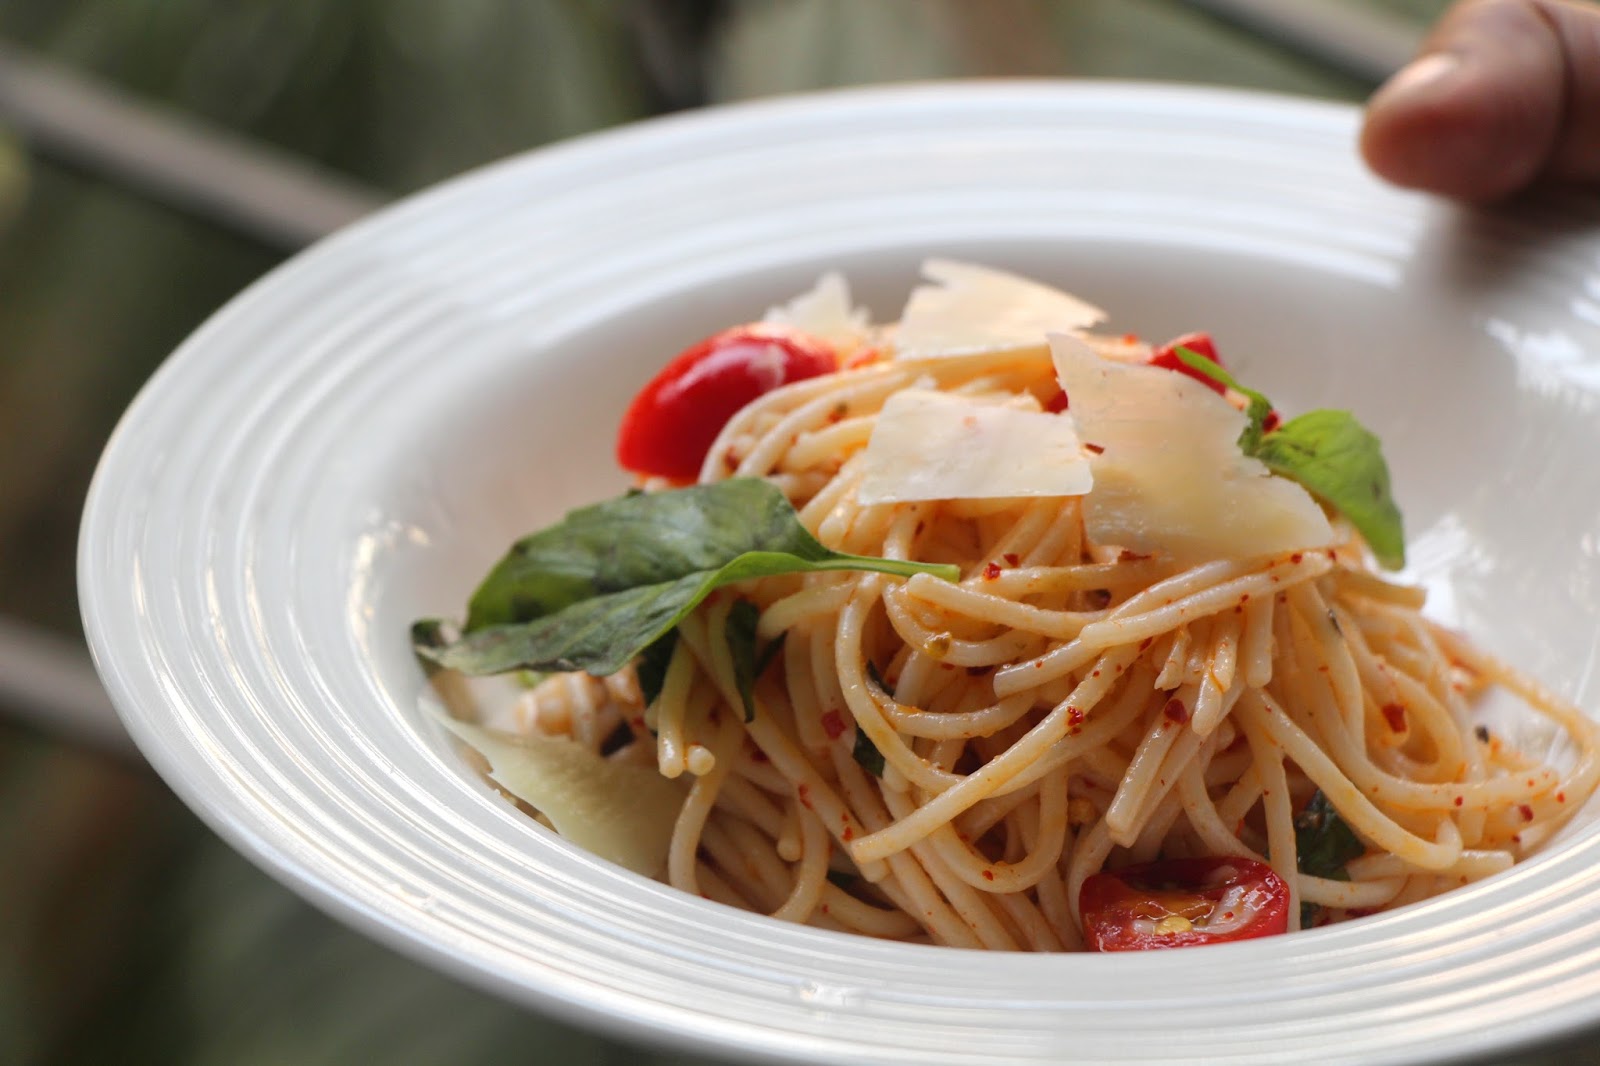
Serves: one person
Ingredients
70g dried spaghetti
10 cherry tomatoes halved (if you'r counting, else a handful)
10 fresh basil leaves torn
1/tsp chilli flakes (adjust to taste)
2 tbsp extra virgin olive oil
2 tbsp grated parmesan
Salt to taste
Method
1. Cook pasta till al dente. Rinse once under cold water. Drain.
2. Toss in cherry tomatos, basil, chilli flakes & olive oil.
3. Toss by hand or with tongs to spread all the ingredients uniformly.
4. Season with salt to taste.
*5. You can at this point gently reheat it on a non stick pan. Be careful not to wilt the veggies.
6. Garnish with grated parmesan.
7. Serve immediately, pack for lunch or into the refrigerator it can go to be reheated in a microwave later.
I don't observe step 5. I reheat in the microwave if required.
My Simplest Pasta Recipe

What is Polenta? It's basically a porridgy dish made of cornmeal which Italian grandma's slaved over the stoves for, stirring constantly. The couple of times I had it abroad, I never had it as a porridge, but in its grilled form with a lovely, rich beef or lamb stew. The one time I had it in India, I was put off by it. Perhaps, I didn't go to the right place.
When you go to a store abroad and ask for polenta, they actually have special cornmeal just to make it. You get instant polenta which does not need so much cooking time and also regular polenta which needs the slaving over the stove mentioned above. Polenta is different from the typical cornmeal in 1) colour, it's apparently yellower 2) texture. It's a coarser grind of corn.
While it may sound easy for folks from North India to differentiate the different types of corn, someone like me, who's from the South, in most cases will have no clue about this grain. We do not have corn in the south. Also, no 'buttas' or ears of corn slathered in lime, salt & pepper and grilled over hot coal. Corn, cornmeal and it's other various forms are completely unfamiliar to me. The one time I tried making corn muffins at home, it tasted so off. My brother spat it out and said "that's the worst thing you've ever made!" So the bag of 'makkai ki atta' that I'd got lay forgotten in my pantry for a while.
Today, April 1st, besides being April Fool's Day, also happens to be my first day of unpaid holiday, which essentially means I'm unemployed currently. I woke up uncharacteristically early for a holiday and was twiddling thumbs when I thought why not try making this polenta thingy. I actually craved the taste of the polenta I'd had long ago and really wanted to know whether it would be possible with Indian fine grained corn.
I know myself well enough to realise, while the grandmamas may have wanted to slave over the stove, I'm more easy going when it comes to food. So I read around and figured, perhaps I could cut down on the stirring considerably and let it cook in its own steam. I was trying this for one person, me, as an experiment and so didn't want to waste too much of cornmeal if it didn't turn out right. This quantity serves one just right as a light meal with a salad. Like most starches, namely rice, noodles etc, polenta also tastes plain (but savoury plain), until you add butter, seasoning, cheese and have a good accompaniment. In my case, I topped it off with parmesan & chilli flakes and accompanied it with a salad of baby spinach & tomatoes in a light dressing.
Now, there is no need to ask me if I liked this thing, cos yes, I loved it. Or else, it wouldn't make its appearance here. Next time though, I'd up the quantity, have a bit of it warm & porridgy, cool the rest in a loaf tin to slice up and grill later. Also, it doesn't make sense to have something on the stove for 40 mins for just one meal. So I'd rather make 4 portions and have leftovers. The ratio of cornmeal to water would be 1:4 if you want a bigger portion size.
This recipe
Serves 1
Time: 40 mins
Ingredients for Polenta
1/3 cup makkai ki atta / cornmeal
2 cups water
10g butter
Grated Cheese
Salt, Pepper/ Chilli Flakes
Method
1. Boil the water in a saucepan which has a lid
2. Lower the heat to medium high. Add the cornmeal and stir with a wooden spoon
3. Keep stirring till the cornmeal does not sink to the bottom, but blends in with the water.
4. At this point you could see lumps, try and break them up, but its ok to just continue stirring.
5. Cover and let cook for 10 mins. Stir to release the parts sticking to the sides and mix everything together once again.
6. Repeat Step 5, 3 times.
7. Uncover the lid, it should look like a gloopy mix now.
8. Let it cook uncovered another 5 mins stirring occasionally.
9. Season with salt, add the butter and let it melt directly in the polenta.
10. At this point its cooked, you can take it off heat at your preference of consistency.
11. Spoon it out to a dish, sprinkle grated cheese and chilli flakes.
12. Serve immediately. It sets as it cools.
Points to Note:
- Since it's served warm, its best to have prep your salad while the polenta's cooking.
- The seasoning is very important, atleast to me, so taste and adjust your salt requirement.
- My salad had an olive oil and apple cider vinegar dressing, which when mixed with the polenta was heaven on a plate!
How to make Polenta

And I also realised, my local grocery store would carry a lot of the exotic stuff I read about online, if only I were to go at the right times. I'd been reading about Kale for a while online and I'd never had a clue as to what this leaf was. For a while, every recipe I looked up seemed to have kale, though I still fail to understand the kale chips part. But yes, even that seems possible. Perhaps, one day, even I'll try it out in my kitchen.
So I got this box of American Curled Kale, which surprisingly was not too expensive. I kept wondering what to do with it for a day or so and then decided to throw caution to the winds and do my own thing. Thankfully, it worked out fine. One thing I remembered from all the articles I'd read up was that kale takes a while to cook. I chewed on a leaf raw, and surprisingly it tasted sweet to me. Anyone else experienced that? It was also quite chewy, but that was something I'd been expecting.
So there is nothing much to this recipe. One day, someone's going to ask me why all these entries and instructions for the most basic things. But then, as I know it, it's for these basics that instructions are most needed. Building it up from there is an easy enough route after that. Maybe you'd want a pasta bake after that, or perhaps an egg custard using kale. But hey, everyone needs a starting point.

Ingredients
- 2 tbsp Olive oil
- 2 cups Kale (stalks removed, leaves torn)
- 4 cloves garlic sliced
- 1/2 red onion finely diced
- salt, pepper & red chilli flakes
- A drizzle of Extra Virgin Olive Oil
- 100g Dried Spaghetti
Method
- Cook the Pasta in salted water al dente. Drain and keep aside.
- In a frying pan, heat olive oil on medium low heat
- Gently saute garlic, onions till onions are translucent.
- Add kale. Cover and cook for 10 mins and let it cook in its own steam
- Remove from heat once kale is tender but still has a bite to it.
- Toss with cooked pasta.
- Add seasoning, chilli flakes & extra virgin olive oil.
- Toss once again to evenly season.
- Serve with warm crusty bread.
PS: Kale tends to turn a darker green when cooked.
Kale & Garlic Pasta

If you've been following this blog for a while now, you would have noticed some changes, not just in the layout, but also in the content. What started as a dessert blog has more or less changed into a savoury blog with lots of healthy eating options and mostly vegetarian.
Who'd have thunk?!!! Me? Vegetarian? Even I sometimes baulk when I think about being vegetarian. But honestly, I don't know if it's growing up, listening to my body, being ecological or being just time constrained, I prefer eating vegetarian atleast when I'm at home. It's difficult to be vegetarian when I'm eating out in India. Here, in Bombay, I hesitate to walk into a posh restaurant and be happy with the vegetarian fare over the non vegetarian. At home is a different matter, I get to play around with ingredients, flavours, textures and create dishes where meat would actually be superfluous if added.
Though I tend to use seasonal veggies available in my local grocery store, when I do have access to special ingredients, leaves, shoots & such, I'm eager to try them out and see how they taste. I've always loved arugula, but have never been able to manage a regular supply of it. On my recent trip to Hypercity in Malad, I was so happy to see so many salad greens on the shelves. I came back with bags of arugula, micro greens, bocconcini and other varieties of cheeses which I don't always get locally.
I wanted something which focused on the creaminess of the bocconcini, had the bitter bite of the rocket leaves and natural sweetness of winter carrots. Throw in some red onions for a punch and some orange carpels and juice to mellow it down.

It's a recipe made entirely on a whim and that's when I realised I'm really getting the hang of salads. I tried it out for a couple of days, the first two times I had orange carpels which I impatiently pulled out and use, the third time, I just used orange juice in the dressing. And that worked magically. If you do segment the oranges properly, I'm sure it would be lovely. Just that I don't have the patience to do it with the mandarin variety.
Ingredients
2 cups rocket/ arugula leaves
1 winter carrot grated
1/2 red onion sliced
1/2 orange segmented
4 rounds of bocconcini halved.
Dressing.
3 tbsp olive oil
2 tbsp apple cider vinegar
1 tbsp orange juice
salt & pepper to taste.
Whisk all the dressing ingredients till completely mixed.
Toss all the salad ingredients together.
Drizzle dressing over. Serve with a nice crusty bread.

Arugula, Bocconcini & Carrot Salad

I picked up a red cabbage last week from the veggie rack at the food store. I didn't know what to do with it, but I thought I'd get it first and think later on. This is part of my initiative to eat more veggies (Uh oh I ordered chicken lollipop again tonight) and try new things.
I googled and found this on BBC Goodfood. It's really good. And the peanuts, they taste so good in this salad. So crunchy and so filling. The original recipe asked for groundnut oil, I used the toasted sesame oil I had at hand. It added a nice nutty flavour to the salad.
Tangy Carrot, Red Cabbage & Onion Salad.

Roasted Strawberries! Have you tried them when I told you to last time? Click the previous sentence for the recipe.
This is part of my bad girl breakfast series when I go ahead and up my toasts to another level altogether. This one has Roasted Strawberries, Feta & Mint leaves on buttered Toast.
Roasted Strawberries on Toast

Didn't I have you at nachos. Didn't I? And aren't you feeling a bit bad that I don't really have nachos in this pic? Fear not. It's because nachos didn't really strike me at all! Not till dinner time and I just felt an extra crunch missing.
This salad is almost the same as a Pico de Gallo except I added peppers cos I was in the mood for them and I had a both red and yellow peppers at home. It's always been a little exotic, these peppers. We never had them when we were kids. And to me for the longest time, I really didn't think there was any difference. But slowly I can differentiate them in taste, though even now I'm really not that confident of a blind taste test.
Red & Yellow Peppers Nacho Salad

For someone beyond a certain age, I sure order in a lot. That is despite having a cook who comes in daily and would make anything I'd ask her to. One problem I have is, I don't like warming up food. I'd rather have it fresh than from the fridge. Of course, there are exceptions. But most days it's either the local Chinese or Punjabi food which makes it to my dinner plate.
Then I realised. The one thing I order the most is something called Teppanyaki Noodles from Wok Hei. I have an unreasonable amount of these noodles. So I thought maybe I should try making it at home just to make myself feel healthier. Off I went in search of Teppanyaki Noodles.
Sesame + Spinach Noodles (Wagamama)

I had these really interesting kebabs at one of our company parties. Being in a food company, you get introduced to all sorts of things.This was one of those. They served it with slices of raw mango which was just soo right for the October heat in Bombay. Now that November is not helping us any further in the temperature department, these babies are just right as a cool starter for a party at home.
Yoghurt Kebabs

Last week, my boss took my colleague and me out for dinner to Masala Library. He wanted us to experience an Indian restaurant that does things different. It was certainly interesting, some of those things were really good, but to be really honest, there was nothing that really blew me away. Perhaps I've become too picky. Like they were trying too hard and not really getting there. One of those things I really enjoyed there was the jalebi caviar. Little boondis of jalebis packed into a circular disc surrounded by a pool of rabdi. I knew I had to try making it. So here it is, my foray into Indian desserts on this blog.
Jalebi & Rabdi

As I must have mentioned earlier, I'm trying to put an end to my eating out tendencies and make more stuff at home. I'm not saying everything I make is fantastically healthy, but I'm thinking its perhaps better than not knowing the ingredients used and the amount of fat used. In this case, I know how much butter I'm injecting into my body if my serving size is unusually large and also I can rest assured I have enough veggies going inside me.
Beetroot, Sweet Potato & Spinach Au Gratin

Erussery

On Independence Day when I had a day off and my oven conked off, in addition to making those Pistachio Pancakes, I made 3 dishes for Onam. A valiant effort, even f I say so myself.
At the end of it all there were two things I realized
Pachchadi

Inji Puli (aka Puli Inji)
If there is anything that can elevate a simple cheese sandwich to a gourmet experience, you need look no further than caramelized onions.

The Kitchn has done a fantastic article on caramelized onions. Please click anywhere on the previous sentence to go the Kitchn website. I don't really need to elaborate more than what they have written there
I've put up pictures of stages of caramelizing onions.
Caramelised Onions

Congratulate me! This is my first post with an actual DSLR pic. One I haven't yet learnt to use despite being in my hands for over 6 months. I probably took a hundred shots of this yoghurt before I had one I moderately liked. This one. But by then I didn't have a choice. My frozen yoghurt had begun dripping and this one was the last serving. So I stuck a spoon in it and gobbled it all up melted, frozen and all.
Fruity Froyo
Subscribe to:
Posts
(
Atom
)


