

1 onion chopped
3 chillis
1tbs ginger garlic paste
4 small brinjal quartered
1/2 tsp turmeric
1 tsp garam masala
One tiny bunch coriander chopped
2 tsp curd
1/2 lime squeezed
150g rice
210ml water
Oil & salt
Soak rice for 20 mins drain. Do the prep meanwhile
Use cooker
Saute onions and green chillies in oil still onion becomes translucent.
Add gg paste, stir and leave till the raw smell goes off
Add turmeric and masala. Stir.
Add brinjal, curd, coriander, lime juice. Stir. Do not cook brinjal further
Add rice and stir. Top with water. Adjust Salt
Cover the cooker without the whistle till steam comes out. Place whistle turn off heat and let it cook in the steam inside about 10 mins or till steam goes off.
Eggplant Biryani/Pulao

Dear All, We used to run a regular blog here a while ago. Some of these recipes are gems which I reuse repeatedly cos they are so bloody easy plus delicious. If you don't know me or know barely enough about me, know this that I bake more than I cook, regular cooking is not my forte (beyond the copious amounts of Kachimoru that I make), and can eat the same Choru (boiled red rice) and cheru payar (green moong dal) every single day as long as someone else has made it for me. But I cannot disassociate myself from the fact that I like good food. When I make something, it better taste good. I also don't have ninja chopping skills. So when I say this curry comes together in 20 minutes, I think that's easy enough to believe.
I got this recipe from my aunt Annie, after having it at her place one day and totally falling in love with it. Hence Annie's chicken curry. The rest of the fab cooks in the family call it biryani chicken. But this is not biryani chicken to me cos my biryani is quite different. That's another story for another day though. Without further preamble, here's the recipe.
Ingredients
Chicken Breast - 1/2 kg cubed
Oil (Coconut/Refined) - 2 tbsp
Onion - 1/2 kg chopped
Garlic - 5 cloves finely chopped
Green Chillies - 7 finely chopped
Ginger - 1 piece finely chopped
Juice of 1 lime
Coriander Leaves - 1 bunch or even few stems more
Coconut - 1 tbsp
Curd - 1 tbsp
Cashews or Almonds - 6
Grind these ingredients together
Method
Heat oil in a pan
Saute onions till translucent
Add the chillies, garlic, ginger and saute till the raw smell goes off.
Add chicken, salt to season, cover and cook in the chicken's own juices
Once the chicken is cooked, add the crushed coriander mix and gently bring to simmer. Don't overcook or the curry will lose its colour.
Add lime juice to taste
Annie's Chicken Curry

That one time I deep fried something and yeah gave heartattack food to a bunch of doctors. I wish I had a better picture, but I was given exactly 10 seconds for this one. My brother wanted veg starters for a party. If you know me, you know I'm really clueless about a) Parties b) Veg Starters  😱 This so does not fall under the things I thought I could do. But apparently now I do
  😊
😊
These are Jalapeño Cheese Poppers. As I'm finding out the hard way, those jalapeños were really spicy. My hands are still burning. This is the easiest non time consuming thing I could come up with. Except for the ton of oil I have leftover, I have no regrets. The good doctor might say aka my brother otherwise, but I think I did a decent job.
1. Chop jalapenos lengthwise into rings in poppable size.
2. Scoop out the seeds.
3. Pipe cream cheese inside the jalapeno rings. (I got lazy and used Amul Chilli Cheese spread)
4. Dip in milk, seasoned flour, milk again & bread crumbs (I used homemade breadcrumbs from last weeks sourdough loaf flavoured with thyme. Guaranteed crunchiness)
5. Fry till golden brown
6. Wait to cool #patience 🙄
🙄
7. Pop 'em one by one into your mouth.
2. Scoop out the seeds.
3. Pipe cream cheese inside the jalapeno rings. (I got lazy and used Amul Chilli Cheese spread)
4. Dip in milk, seasoned flour, milk again & bread crumbs (I used homemade breadcrumbs from last weeks sourdough loaf flavoured with thyme. Guaranteed crunchiness)
5. Fry till golden brown
6. Wait to cool #patience
7. Pop 'em one by one into your mouth.
Jalapeno Cheese Poppers

It's been a while I know. But over the last few months, I kind of became occupied with stuff and then made myself unoccupied and then all over again. Life has been transitional for a while and it shall be for a while more. The more I take cognizance of that fact and accept it, the easier it will be for me I guess. Besides, gobbling my way through Gochujang noodles on a regular basis does not make good blog features.
Meanwhile, Aebleskivers have been on my list of things to do for a while now. In October, when I pitched initially to contribute to a site, I actually wrote down Aebleskivers. It never saw the light of day till now though. Aebleskivers are traditional Danish Pancake Balls. (I'm still silly enough to giggle every time I write balls.. heeheee) Apparently made during Christmas and supposed to have apple in them I think? I butchered a recipe from Nordic Food & Living and kind of made it this Sunday morning for the kids. Not that the kids I know really appreciate anything their aunt slaves over the stove for them. They always and always go back to their Ammachi's pineapple jam & toast. Spoilsports!
The adults loved it though. Wait! before the adults came in, quite a few of these balls (heehee..) ended up in my tummy as well. Oh! who am I kidding? I tend to forget I belong to the adult category. Having the mental/emotional capability of an under-aged teen in an over-sized body doesn't really help anyone. Meh! on that.

I got my Unniappam Chatti out for this one. Not that I'd ever used it before. I got it a while ago thinking I'd make unniappams sometime and then forgot about it. But Aebleskivers seemed like a good way to inaugrate it. Unniappam Chatti = Paniyaram Chatti = Whatever other pans there are which have semi circular (hemispherical sounds better perhaps?)indentations on them. I could put up a pic here, but then that would make my blog too big and have too many pics and I'm just that bit unfriendly enough to not want to do that. (Pat on my back for being selfish.)
In reality, the recipe is actually that of a pancake, just that the treatment is different or rather the equipment used is different. the pan really helps give that 'Wohow' effect. If you'd rather make pancakes who am I to stop you. But these make nice snacks you can take on road trips, pack it up in a hamper for a picnic or even an after school snack for kids. Texturally mine were crispy on the outside and soft as clouds in the middle. It's better had warm or rather straight off the stove, but I really can't imagine anyone making this on order unless it were a restaurant!
I made them plain, some filled with chocolate chips, and some with homemade Strawberry Orange Jam. One word of caution, you always need more filling than you think! For those peevish about making their own jam, roll up your sleeves and get to it, cos strawberry season is getting over soon and you really want to bottle up all that goodness till next year right? Here's a link to help you out - DIY: Making Jam

Makes approximately 24 teeny weeny balls
Ingredients
2 eggs separated
11/2 cups all purpose flour
1/2 tsp baking soda
1/2 cup buttermilk
60g butter melted and cooled
1 tbsp sugar
pinch salt
1/4 cup chocolate chips (optional)
1/8 cup jam (optional)
2 tbsp icing sugar
Method
- Whisk egg whites till stiff peaks form and set aside
- in a different bowl, dry whisk flour, soda, sugar and salt.
- Add yolks & buttermilk and mix till thoroughly combined. Used hand mixer if required
- Pour melted & cooled butter to the batter and mix it in.
- Using a wooden spoon/spatula fold in egg whites gently to the mix in three parts till you do not see white streaks. (Do not whack the shit out of it, you want the air from the egg whites to remain in the batter)
- Heat the aebleskiver pan, add butter to each of those indentations.
- Gently drop enough batter to fill 3/4 of the indent if making plain balls, else fill 1/4 of the indentation, add the topping and then cover till it reaches 3/4 of the indent.
- Flip the balls using a skewer when they are firm on one side.
- You're ready when both sides are golden and firm.
- Serve onto plate. Sprinkle with icing sugar. You're good to go!
Aebleskivers (Pancake Balls)

These cupcakes serve a purpose. I wouldn't ever say they are the best looking or the best tasting. They're fairly tasty, fairly moist (apparently this word makes most people go ugghhh) cupcakes which serve one purpose and one purpose only in this life. They assuage my craving for chocolate & sugar when I'm pms'ing.
In a world where approximately 50% of the adult population undergo severe discomfort every month, we sure are hesitant to speak out aloud about it. Me included. You know that time when your boobs start feeling heavy, your tummy is bloated and you're just plain cranky and nothing will ever satisfy you? This is not the time for heavy lifting. You want something quick, easy, can be made even in the middle of the night and you can lick the batter clean without a hint of guilt. Welcome to my world.
These cupcakes take about 30 mins start to finish. If you want to be frosting these babies, making it while the cupcakes are in the oven would be a good idea. I'd just mix Hershey's and cream and be done with it. Except I don't even wait that long. The batter is good for me. I can have it now and maybe the cupcakes later.
While the original recipe from Food.com uses no eggs, I add one to mine cos I tried it without eggs and it just didn't feel right to me. So when I made it again I added the egg. Feels good. It's better and probably safer to eat the batter without raw eggs in it. But I'm not complaining. Really.
And you know how I make the batter? I blitz it in the mixer. Nigella style. Punk!
Makes 6 fairly large cupcakes
Ingredients
3/4 cup - All Purpose Flour
1/2 tsp - Baking Soda
1/4 cup - Cocoa
Pinch of Salt
1/4 cup - Water
1 Egg
1/2 cup - Sugar
1/4 cup - Oil
1/2 tsp - Vinegar
Directions
1. Preheat oven to 180C
2. Dry whisk in a bowl flour, baking soda, cocoa and salt and set aside
3. In a mixer, blitz water, sugar, egg, oil, vinegar till sugar granules have dissolved
4. Add the dry ingredients and blitz till combined. It's a thick batter.
5. Pour into individual cupcake liners/containers
6. Bake for approx 15-20 mins depending on size of cupcakes.
7. Lick the batter.
8. Sleep peacefully
PMS Cupcakes aka Quick Chocolate Cupcakes

I am of the firm belief you need one solid basic cake recipe. If you have that sorted, everything else is a permutation & combination. I've been baking since before I started boiling water, so it's fair to say baking comes more naturally to me than other things. But there is this one standard cake recipe I use, which I then play around with. A dash of lemon, some orange zest, a spot of cocoa, fruit slices, anything really works with this recipe.

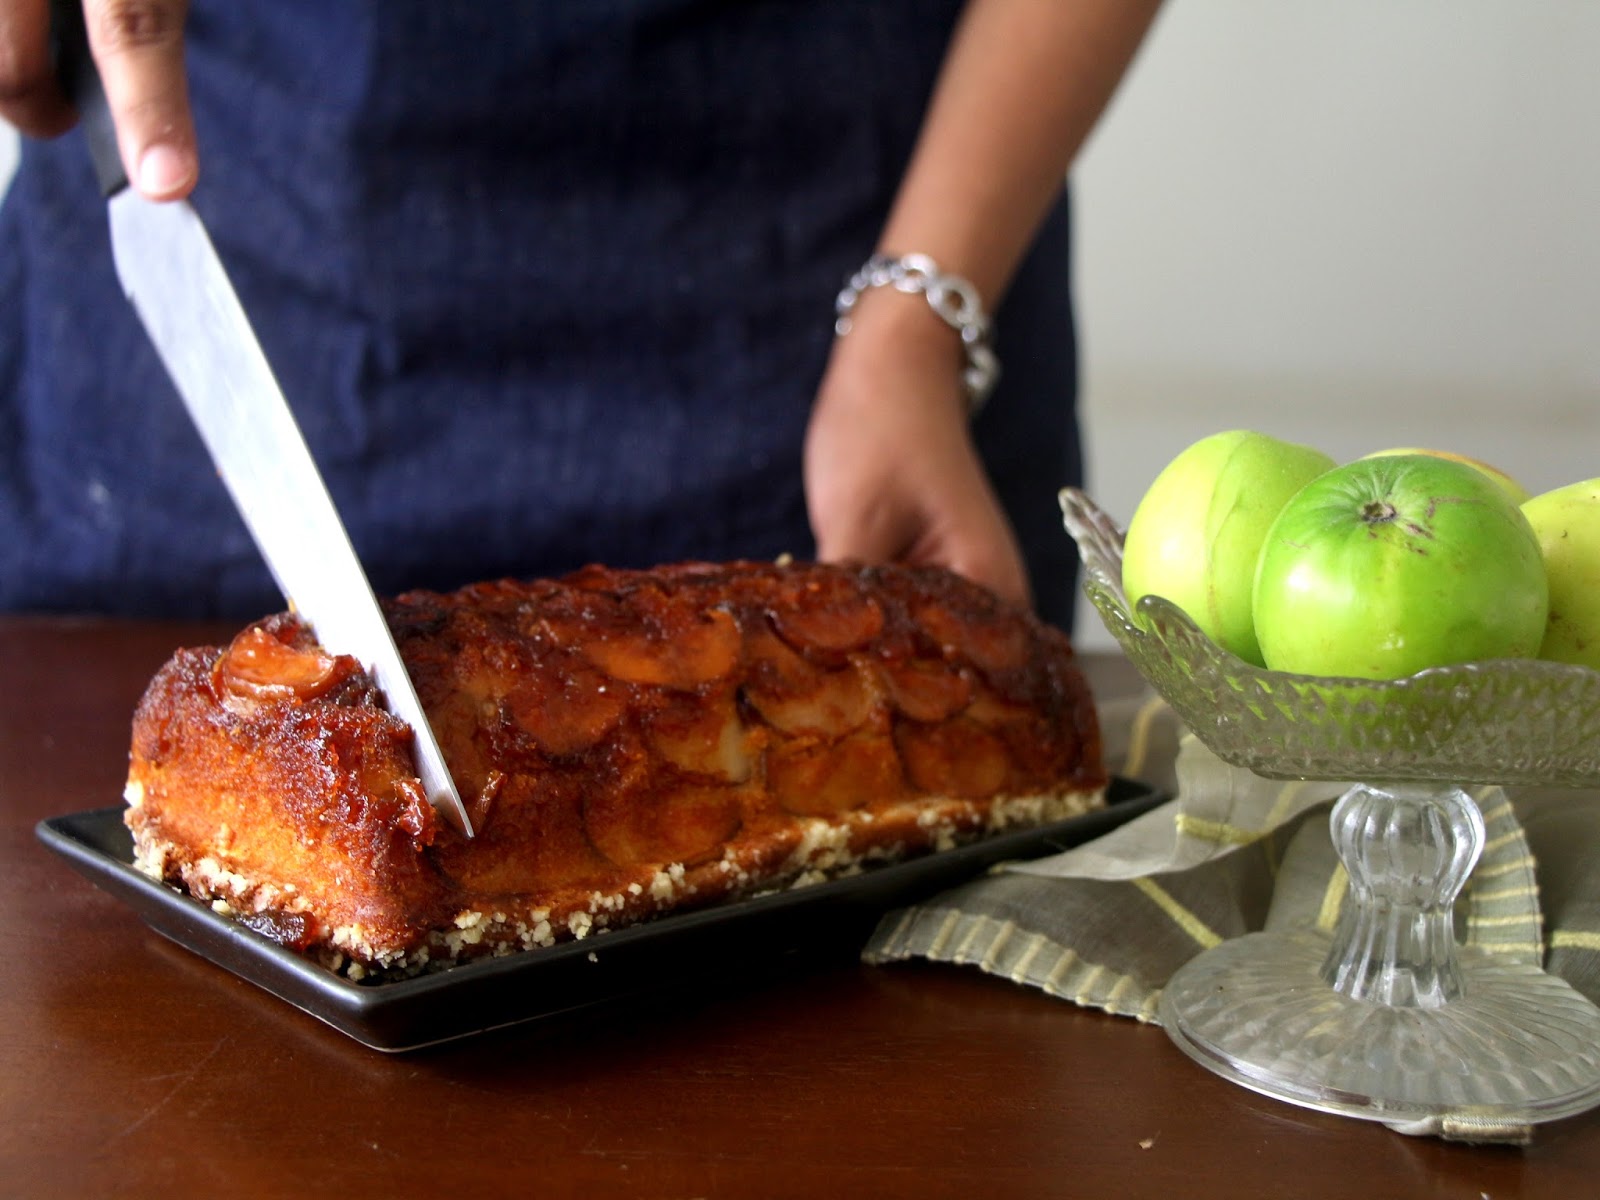
Today, I decided to add this fruit known locally as 'Bore'. Sounds funny right? It's also called 'Ber' or Indian Jujube apparently. It's only the last couple of years I've been having it, and it's caught my fancy. I try and get some of these when they are in season cos they are so fresh and crunchy and more sweet than sour. It tastes like a fruit we call 'Sabarjil' in Malayalam. Perhaps it's the same. Also, I had a new baking dish I've been eager to try out. So I decided to make an Upside Down Cake with this fruit.

Making Upside Down Cakes is a no brainer. Caramelize sugar till it reaches an amber gold colour, quickly coat the base of the baking tray. Pour batter on top. Bake. Invert the cake out of the dish almost as soon as it's out of the oven, or else the sugar caramel cools down and sticks to the baking dish. For this cake, I topped the caramel with slices of fruit in a nice pattern and then poured cake batter on top. On top of the batter, I added a crumble base, which are those white specks at the bottom of the cake you see in this picture. So I had oozy, almost bitter caramel on top of the cake, soft cooked fruit, an even softer cake and then a nice crunchy crumble base. Just so you have a fair idea of how me mind works. I like textures and this one gives me quite a few.
For the cake, I used my standard standard cake recipe which I'm going to share right here. All you have to remember is that a standard Indian egg weighs 50g. In most cases, we get a medium sized egg which falls in this category. If they are the smaller kinds, they will weigh ~40g, and if they are fairly large, they will come close to 60g. But for ease of representation, let's consider standard eggs as 50g.
The rest of the ingredients work in multiples of the egg quantity. So if you have one egg which weighs 50g, use 50g of butter, 50g of sugar, 50g of flour and 1/2 tsp of baking powder. If you have 2 eggs multiply the ingredients by 2 (100g butter, 100g sugar, 100g flour, 1 tsp baking powder) and so on. Of course, you'd have to adjust the size of the baking tins depending on the quantity. I always add a tablespoon of liquid to adjust the batter consistency and this I think gives me a softer cake. Normally it's milk, but occasionally, like in this case, when I want to be frivolous and give a different flavour to the cake, I add a splash of liqueur. So basically this is a pound cake which I've kind of worked around for my convenience.
Generally all recipes ask for a drop of vanilla extract/essence/lemon zest to eliminate the eggy flavour. In reality, I almost never have vanilla at hand and unless the cake specifically calls for lemon/lime, I don't zest it in. Maybe because I'm not so averse to the flavour of eggs, but I almost always feel that if you beat in the egg really well after each addition, it removes any egginess.
Ingredients
150g - Butter
150g - Sugar
3 - Eggs
150g - All Purpose Flour/Maida
1+1/4 tsp - Baking Powder
3 tbsp - Liquid (Milk, Liqueur,Yogurt)
Directions
1. Preheat oven to 180C. Grease and line an 8" round cake tin
2. Cream Butter and sugar till light and fluffy. Don't try and save time on this. Cream till it becomes light in colour and you cant feel the sugar grains
3. Add the eggs in one by one. Beat well after each addition, till finally the eggs are completely mixed in and the mix is light and fluffy
4. Sift the flour and baking powder together. Fold it into the batter in batches. You needn't be too gentle about this. Go ahead and fold
5. Add in the liquid and stir till its uniformly mixed in.
6. Pour into cake tin and bake for 45-50 mins (my oven takes this long. Check your oven timing the first time around)
7. When a toothpick comes out clean/cake springs back on touch, you're good to go.
The best part about this recipe is, you can bake it in a round tin, a loaf tin or as I did this time, in a curved tin. It really doesn't affect the cake too much. Like I said earlier, depending on the size of the cake I want, I play around and make it for 1 or 2 eggs occasionally. I use the one with 2 eggs quite often cos thats the easiest when it comes to using butter. 100g butter is how we get it here and it's an ideal measurement when it comes to pouring into cupcake liners and baking a quick batch.
My Very Basic Cake Recipe
It seems like ages since I've updated this blog. Oh wait! It's actually been ages. Over two months and not an entry. Seems a little strange. It's not like I've not been cooking; I've been cooking like a maniac some days. It's not like I didn't have time; I've been a sloth quite a few of those days. It's just, you know, just not been going right. Just when I think, I have life figured out, I have something new to look forward to, it all seems to come crashing down. So much so, I don't think I should think so much anymore


I've been making this so often, but forget to take a picture every time. Yesterday for some reason, I got confused with the order quantities and had a ton leftover which I boxed up and gave to my sister in law. I also got her to model for me when she came over. Not an easy task with two rowdy boys, one who wanted the phone and the other who just want to go home or get banana chips!
This is actually the easiest thing to make. If you're from south of the Vindhyas you probably make Lemon Rice, this is just savvying it up using rice noodles instead of rice. I'm going to go ahead and call this Lemon Rice Noodles though in fact I'm actually using limes. Just the way it's been called so far and I'm no path-breaking trendsetter here.
Ingredients
Rice Noodles - 200g pack
Water to cook the noodles
1 tbsp - sunflower oil
1 tsp - mustard seeds
3 - green chillis split long
1 - sprig curry leaf
1/2 tsp - turmeric powder
Juice of 3 limes
Salt to taste
Method
1. Cook rice noodles till al dente. Follow instructions on the pack. Do not let it turn to mush.
2. Drain & run cooked noodles under cold water to stop cooking. Further drain in colander
3. In a wok, heat the oil and temper mustard seeds
4. Add green chillis & curry leaves to the temper. Stir around till the raw taste goes off. Take care to ensure the curry leaves don't burn.
5. Briefly take the wok off heat and add turmeric, back on heat and stir with the chillis and curry leaves. Again, take care the turmeric doesnt burn.
6. Take the wok off heat and add the drained and cooled noodles.
7. Sprinkle lime juice and salt over the noodles and toss to distribute evenly. (I used my hands to toss the noodles)
8. Place it back on heat and gently warm it through allowing the flavours to combine.
8. Et Voila! Lemon Rice Noodles ready.


If you follow me on Facebook, you'd know by now I contribute to a food app called TinyOwl in Bombay. Introduced by a couple of ex colleagues of mine, this app has been something that's been keeping me busy for the last couple of months. It started off slow, but has been building up pace. It is a place for me to try and figure out whether people actually enjoy the food I make. I can't say very convincingly it's all very smooth sailing, but some dishes fare better than others and this Lemon Rice Noodles is something which has received the most favourable comments so far. I usually serve this with a Ginger & Chilli yogurt based dip which goes really really well. It's not really necessary though. I love it just as it is.

I've been making this so often, but forget to take a picture every time. Yesterday for some reason, I got confused with the order quantities and had a ton leftover which I boxed up and gave to my sister in law. I also got her to model for me when she came over. Not an easy task with two rowdy boys, one who wanted the phone and the other who just want to go home or get banana chips!
This is actually the easiest thing to make. If you're from south of the Vindhyas you probably make Lemon Rice, this is just savvying it up using rice noodles instead of rice. I'm going to go ahead and call this Lemon Rice Noodles though in fact I'm actually using limes. Just the way it's been called so far and I'm no path-breaking trendsetter here.
Ingredients
Rice Noodles - 200g pack
Water to cook the noodles
1 tbsp - sunflower oil
1 tsp - mustard seeds
3 - green chillis split long
1 - sprig curry leaf
1/2 tsp - turmeric powder
Juice of 3 limes
Salt to taste
Method
1. Cook rice noodles till al dente. Follow instructions on the pack. Do not let it turn to mush.
2. Drain & run cooked noodles under cold water to stop cooking. Further drain in colander
3. In a wok, heat the oil and temper mustard seeds
4. Add green chillis & curry leaves to the temper. Stir around till the raw taste goes off. Take care to ensure the curry leaves don't burn.
5. Briefly take the wok off heat and add turmeric, back on heat and stir with the chillis and curry leaves. Again, take care the turmeric doesnt burn.
6. Take the wok off heat and add the drained and cooled noodles.
7. Sprinkle lime juice and salt over the noodles and toss to distribute evenly. (I used my hands to toss the noodles)
8. Place it back on heat and gently warm it through allowing the flavours to combine.
8. Et Voila! Lemon Rice Noodles ready.

Lemon Rice Noodles

If they have a word for beetroot in Malayalam, I don't know of it. When I was a kid and at home, Mum would make beetroot thoran, so would the chechis in the REC ladies hostel mess. Of course, mum's thoran is way way better than the chechis. In fact, there is no comparison. But the fact is, beetroot any which way always had my attention. Perhaps it is the colour, or maybe the natural sweetness it imparts to anything its cooked with, or maybe because my hands always looked so bloody and gory after I'd had it. haha... so many reasons to like beetroot.

You know how it is when you're a kid and you never bothered entering the kitchen. I never really had much of a clue about cooking vegetables, what they looked like, and in funny instances how to buy them. Like the time I went to the local store and asked for a quarter kilo of coriander leaves and the store guy looked at me strangely and asked 'ningalde veettil innenna sadya aano?' loosely translated to 'are you cooking a feast today in your house'. :D :D :D
So in the same way, I really didn't know that beetroots don't look as pretty on the outside as they do on the inside. That dirty looking brown thing certainly couldn't be my lovely beets could they? It took some amount of checking and scratching the surface to figure that yes underneath that dirty, grimy looking surface, lay this pretty coloured root. Makes you wonder, how did humans really come about eating all these things. Who would have thought to dig up some dirty spud from the ground, scratch the surface and say 'oh! this is edible. And tasty too!' It's a thought that always runs through my mind. Who found out all these things first. That if you cook meat, it tastes better. Did they discover it accidentally? Something we take so for granted these days. But who would have been there to show them otherwise?

This dish is best cooked and had fresh. Inspired by an episode on zucchini fritters I once saw on Nigella's show, I substituted with beets cos well, beets are easier to source, cheaper to buy and also something I like quite a bit. Beetroot and feta is always a nice combo, the sweetness of beets cut through by the saltiness of feta. I also had a greek yogurt / hung curd dip to accompany this. But seriously the fritters are delicious straight off the pan even without any accompaniments.

Ingredients
2 beets grated
1/2 cup chopped coriander
1 egg beaten
1/4 cup all purpose flour
50g feta crumbled
1/2 tsp salt
Olive oil to pan fry.
Method
Mix all the ingredients together. Season with salt.
In a non-stick pan over medium heat, drizzle oil just to coat the surface.
Drop spoonfuls of batter onto the pan. Do not overcrowd. Gently flatten with spatula.
Cook 3-4 minutes per side. Drain on paper towels.
Serve warm!
And not even the teeniest bit difficult to make! Makes me an even happier person.
*Generally for zucchini fritters, you drain the liquid from the zucchini by prepping it with salt a couple of hours. I did not do it for the beets. I like a little crunch on the beets. You could try doing it though. Do let me know how that works out for you.
** If you find the egg mix is not enough to bind the whole batter together, add a spot of cream, just enough to bring it all together.
Beetroot & Feta Fritters

What is comfort food to you? I can fairly say, to me, it is anything which has coconut milk as an ingredient. The flavours have become so ingrained to my senses, that anything which has coconut milk automatically reminds me of home and Kerala. And a vegetable stew is something made in homes across the length and breadth of the state. Besides the addition of an odd spice or a curry leaf here and there, I doubt it varies too much. Served with any kind of appams and bread, it makes its way to a breakfast table quite frequently.
Of late, I've been spending too much time at home. The excuse is I want time to think and clear my mind, which while true also leads to other consequences such as barely stepping out even for groceries. My excuse, it's too much effort in this heat to dress decently to go out and get groceries. I could always order them online you'd say, but then I'm a fan of the non digital and the touch and feel. Oh man! that probably made me sound like a chimpanzee in this tech age. But it is true, even though I know it's Danone yogurt I'm going to pick up and a bag of carrots are quite possibly the same everywhere, there is joy in going to the local grocery store and checking the product. Except not in this heat.
Last weekend, when I'd called my brother over for lunch, I made appams and beef curry. A beef curry which is so familiar to us, cos it's the one my mother made for us almost every Sunday back home. Normally I'm one for measuring out spices and powders and everything. This time, Jayashree looked at me in surprise when I started throwing in spices willy nilly. "Spoon! Spoon!' she kept saying and I kept ignoring her. It comes out right, no matter what I do. If there is one curry in the world I know I can twist and turn and still get right, it's that one. So I planned to make a veg version for you on this page, just so everyone could enjoy my favourite Sunday curry. Unfortunately, that is when I realised I dont have tomatoes in the house.
The good thing about this stew is that you barely need any fancy ingredients. It's all regular staple kitchen stuff. Onions, chills, ginger, garlic, whole spices, and veggies of your choice - potatoes, carrots & peas in this case. Sometimes we chuck the veggies and just add a couple of boiled eggs and then it becomes and egg curry. Any sturdy vegetable would do. You could make this a mutton stew by just adding mutton. There is one thing you need to make this stew a success though... and that is coconut milk. Freshly pressed coconut milk would be awesome. But who's got the time and energy for that these days and that too in tiny urban kitchens. I used a tetrapak this time. But I've also used those powdered versions and found it quite nice, though not exactly the flavours of fresh milk.

I have to tell you, when Jayashree saw me make this, she looked worried. It had no masalas, no tomato, what are you making was the unspoken question. Then she tasted it and said, ok, I'm making this at home for my kids. That's high praise indeed! :-)
Ingredients
2 tbsp coconut oil/refined oil
4 Cardamom pods whole
5 cloves
2 sticks cinnamon broken
2 onions thinly sliced
5 chillis sliced long
1 tbsp freshly ground ginger
1 tbsp freshly ground garlic
2 potatoes diced
3 carrots diced
1/2 cup peas
2 cups coconut milk/water
1/2 cup coconut cream (first press)
*1/2 tsp garam masala
Method
Heat oil in a wok (Malayalees use the wok quite a bit, we call it a 'Cheena chatti' or a Chinese pot)
Temper the whole spices to release their flavours.
Add sliced onions & chillis and gently sweat till the onions turn translucent.
Add ginger, garlic paste and cook till the raw flavour goes off.
Add in potatoes, carrots, peas and other veggies and stir to completely coat with the spices and other flavours.
Pour in water/coconut milk, cover and cook till the veggies are just done.
Add coconut cream and gently simmer for 2 mins without bringing to a boil.
Sprinkle garam masala on top just before serving.
*I sprinkle garam masala just after cooking and turning off the flame. Then I keep the dish covered till it's time to serve and the steam emanates the aroma of the spices when I open up the dish.
**My mum advises adding a spot of vinegar to bring in the sour flavour. I did not use it this time. I never have actually. Mum also says, the potatoes have a sourness of its own, which it lends to the dish.
The Quintessential Kerala Vegetable Stew

I know I've not been the biggest advocate for pasta. For the longest time I wondered what all the fuss was about. It was just pasta right? like carbs, like rice. It all depended on the sauce you added to it. So most times, I'd chuck the pasta and use other stuff instead with the sauce. Like when I made my Boozy Pasta Sauce. But over the last one year, I've been taking packed lunches to work and it made so much sense to make simple pasta dishes which would remain sturdy and fresh for lunch. I guess this one's more a salad than a saucy pasta. It takes hardly anytime to make and is not messy to pack and go. And also very good for summer when you don't want to be near a stove too long.
It is not advisable to wash cooked pasta when there is a sauce to bind the dish together. But in this case, since there is no sauce, I rinse the pasta in cold water just once to wash the excess starch away.
After all this, you must be thinking I've made some awesomely new, outlanding dish here, but read the title. It is not called 'My Simplest Pasta Recipe' without a reason. There is actually no recipe :-)
You only have to be careful with your ingredients.

Serves: one person
Ingredients
70g dried spaghetti
10 cherry tomatoes halved (if you'r counting, else a handful)
10 fresh basil leaves torn
1/tsp chilli flakes (adjust to taste)
2 tbsp extra virgin olive oil
2 tbsp grated parmesan
Salt to taste
Method
1. Cook pasta till al dente. Rinse once under cold water. Drain.
2. Toss in cherry tomatos, basil, chilli flakes & olive oil.
3. Toss by hand or with tongs to spread all the ingredients uniformly.
4. Season with salt to taste.
*5. You can at this point gently reheat it on a non stick pan. Be careful not to wilt the veggies.
6. Garnish with grated parmesan.
7. Serve immediately, pack for lunch or into the refrigerator it can go to be reheated in a microwave later.
I don't observe step 5. I reheat in the microwave if required.
My Simplest Pasta Recipe
 |
| Messy me, posing with a book just cos I got the aspect ratio right finally on my cam. |
This summer seems to be whizzing past. Last summer, I struggled everyday. But this one, despite the heat, is going so far, so good. Of course, it has its moments of ups and downs, but which season doesn't.
There have been moments when I thought I was actually seasoning my favourite beef curry with sweat which started dripping down my chin the moment I entered the kitchen. Moments of self doubt as to where I was heading, even moments where I wondered whether I should continue my vegetarian streak (that didn't hold for too long though)
But, there have also been those wonderful moments when I got to work in a test kitchen for a desi sweet company, moments where I got to bake wonderful cakes for some lovely folks, moments where I got over my mistrust of mangoes and started incorporating them more in my desserts. You'll probably have a lot more of those coming in the next week before the rains actually start. Moments where I unpacked my dad's tripod and finally figured out how to use it. Moments when I went through my camera manual and figured out more than the standard settings, changing tone to what I wanted and that horrible elongated aspect ratio fixed. Moments of success and celebration. None of them really monetary but even then terribly rewarding.
This summer has taught me patience. That with time and effort you can actually fix your own stuff. While I was bludgeoning through life with all the finesse of a cave woman, I'd never put in the effort to make time to clear my thoughts, or get a smooth finish on a cake. This summer has given me that. I may still be floundering a bit but here's to more hope and more good days.
I actually baked pretty look cakes this summer. Some of which I'm extremely proud of. If you've been following this page, you know how I don't try and make things look super neat and clean. But this time, I actually made the effort and surprisingly it did turn out looking nice. I was actually really surprised when the white chocolate ganache spread so evenly on my Victoria Sponge with Boozy Plum Jam Cake
 |
| Victoria Sponge with Boozy Plum Jam & White Chocolate Ganache |
I have to thank Ayesha for giving me free hand with her parents' cakes. Her only condition was one should be fluffy chocolatey and the other fruity with a little bit of booze. I tried and did both for both those cakes and since it was a special occasion tried to make it look a little pretty. I'm sure I could have done better, perhaps more flowers and other stuff on top, but somehow that ganache spread so clean on top I really didn't want to touch it. I could do with better frosting on the sides, so more practice there. A turntable might help, also better room temperature than one set at melt!
 |
| Chocolate Cake, Red Wine soak, Red Wine Chocolate Ganache |
I tested this cake out four times before I made the final one. For those people who think I don't put in too much effort to anything, this probably comes as a little surprise. For those who think I am this little dummy who can't really get anything right. this again probably comes as a surprise. haha! I did! I made it four times. The first one I couldn't believe it was good. So I had to try it again with the egg whites whipped more, then again with the egg whites whipped less, and then once more till I felt the texture was the way I wanted it to be. I had two solid cakes sitting in my fridge, which I'd munch on once in a while, when I felt peckish. And everytime I took a bite, I'd go wow! this tastes soo good for a chocolate cake in summer. I'm not normally a fan of chocolate in summer. But this is light, airy, without being too heavy and feels just right. Which was when I felt more confident about giving it a soak and sending it off. Ayesha's parents loved it. And I'm glad they did. I'd have been terribly disappointed otherwise.
 |
| Chocolate Cake, Chocolate Ganache |
And then there was this cake which started all my cake-scapades. My neighbour is having another baby and was headed home to Pune where her 2 year old daughter was waiting for her. She asked for a birthday cake on short notice. All she wanted was chocolate and nothing too hard for a 2 year old to chew. So basically a soft chocolate cake with a whipped chocolate ganache it was.
 |
| Mango Matcha Cake with a Coconut Frosting |
This one I made for myself. Just to prove to myself, I could again do something different. That I needn't follow someone else's recipe. That sometimes I could make my own and be happy with it.
I would cut a slice every other time I opened the fridge, chop some more mangoes on top and savour it bit by bit, every forkful. With a slight aftertaste of matcha, more focus on the coconut frosting and freshness of sweet ripe mangoes, this one's a winner. But, as my brother says, we're biased. Anything with coconut really works for us.
Summer of 2015

Step 1 to beat the sweltering Mumbai heat this summer - have a lot of cucumber rawa dosa.
Many of those lovely folks I have long rambling conversations with about food had never heard about a cucumber rawa dosa. Of course, there were rawa dosas and masala rawa dosas and onion ones and what not. But cucumber seems like a strange ingredient to add to a dosa. I was introduced to it by my cook and let me tell you I've been having this almost every week, except perhaps in winter, for the last one year. The first time I tried it, I thought it was a fluke, the second time was even better, by the third I realised this one is a keeper.
Like most Indian cooks, Jayashree does not work with measurements. Nothing is ever in grams and cups and everything is as she says 'ek andaaz mein' or my mum would say 'oru kanakkinu' or as the french would say 'au pif'. Which is also why most recipes would taste different in different kitchens and under different hands. You sniff it out, add a little bit here and there, adjust according to taste and personal choice of flavours, et voila, your dish which you can claim as your own is ready.

Unlike a regular dosa, rawa dosa is not made from a fermented batter, but uses curd as a souring agent. It's almost ready made and the batter can be prepared in no time at all. Be warned, make as much as you can, I've never been able to stop at one or two. I serve it with sambar or coconut chutney. Occasionally I have it plain since it has all the seasonings required. If you're too lazy for a sambar or a chutney, ketchup might do in a pinch.

Makes 5 delicious dosas
Ingredients
1 - Cucumber peeled grated
1 - Tomato grated
1 - Onion grated
1/2" ginger grated
1 - green chilli chopped
1/4 cup - coriander leaves chopped
3/4 cup - rawa/semolina
2 tbsp - yogurt
salt to taste
Oil to season tawa/frying pan
Method
1. Grate peeled cucumber, tomato, onion, ginger into a bowl. Add chopped chillis and coriander leaves
2. The grated vegetables will release water. Into that add the rawa/semolina and curd and mix. Adjust rawa based on how much water the veggies release. Season with salt.
3. Heat the pan on low heat and drizzle a teaspoon of oil to season.
4. Scoop 1/4 cup of batter and spread on the pan with a spatula/your hand (It's easier to spread it by hand)
5. Cover and cook till lightly browned on bottom. Flip and cook for 2 minutes. Remove from heat.
6. Continue with the rest of the batter from Step 4.
7. Serve warm with a cup of filter coffee.
Cucumber Rawa Dosa

This is my first motion shot. I have a long way to go, but atleast it's a start. I've still not unpacked the tripod. I balance my camera on a chair sometimes, but mostly I still work handheld. I got my dad's tripod from home a little less than a year ago, but the thought of using it makes me shiver. Have I really progressed that far to be using my father's tripod? Daddy is one of the best photographers I've ever met personally or have seen their work. Back in the day when there was only black and white film, he indulged in SLRs and took some really nice shots mostly of family and my cousins. By the time, I came around, he'd lost his interest in photography, so sadly I didn't look good in pictures even as a child! But my brother and sister? They could have been child models from the photos he'd taken.
Why cornmeal pancakes? Last week, I made a solo trip to Indigo Deli and indulged in some pork chops which came along with cornbread. I was so enamoured by the flavour, though I think it could have been a teeny weeny bit more moist. Made me think, perhaps I've been treating cornmeal with a little too much trepidation. After all, I'd made polenta myself and liked it. I could maybe try out other things as well at home. There's cornbread, that polenta cake recipe I'd been eyeing for a while, but the easiest to start off with? Cornmeal pancakes. As usual, the internet is my friend when it comes to these things. So I read up and figured, I could use my regular pancake recipe, but substitute half the flour with cornmeal. And so I went ahead. I really liked it. Maybe my palate is getting used to cornmeal now.
After having these pancakes again, this time with bacon & poached pear jus, I think these are going to replace regular pancakes for me now. Mostly because of the savoury element which cornmeal imparts that really sets it apart from a regular pancake.

Serves 2
Ingredients
3/4 cup cornmeal
3/4 cup all purpose flour
1/2 tsp salt
2 tbsp sugar
1 tsp baking powder
1 cup milk *
1/2 tsp vinegar *
1 egg
Butter for seasoning the frying pan
Method
1. Whisk all the dry ingredients together in a bowl.
2. In another bowl add vinegar to milk and wait for 5 mins to let it curdle to become buttermilk.
*Alternately use buttermilk
3. Whisk buttermilk and egg together
4. Add wet ingredients to dry and stir till just mixed. Do not overmix. The batter will be thick at this point. If its too thick, add a little bit of milk/buttermilk to loosen it up.
5. In a well season frying pan over low flame, add a little butter to coat the surface and then pour in the batter 1/4 cup at a time.
6. Cover and cook till its golden brown on the underside. Flip and cook again till its cooked through.
7. Repeat till the pancake batter is over.
Serve this with honey, maple syrup, your favourite preserve/compote. I had some strawberry syrup from my last roasting session which I used. Not quite thick as a regular syrup, but very very delicious.
Cornmeal Pancakes

There was a reason I put up that Blender Mayo post, I wanted to use that in this Egg & Potato Salad. It started out as just a Potato Salad, but then I thought just potato and mayo, that would be boring. I added the salad leaves for crunch, Then the egg came for some protein. And the dried cranberries? Well, they were added on just a whim. A whim that worked out so well. It rounded off the other flavours and just added a pop to the salad. You could add raisins instead. I had a tiny unopened bag of cranberries from my last Indigo flight which I thought I'd use up.

Have this salad cold. It deserves an hour at the least in the fridge. You don't want to be eating warm egg & potato salad with mayonnaise. Trust me on that. Especially in this weather. It would be just the right thing to for a working lunch. Fortifying enough for the rest of the day while being refreshing. Try not to overdo the mayo, it could become really heavy. You could use Greek yogurt instead. I hadn't planned it out before and set my yogurt to drain. So no Greek yogurt for me this time.
Serves 2
Ingredients
4 medium sized potatoes
2 eggs
6 salad leaves/lettuce
2 tbsp mayo
salt to season
2 tbsp raisins/dried cranberries to garnish
Method
1. Boil the potatoes unpeeled till just tender and a knife goes through easily. Let it cool and come to room temperature
2. Hardboil the eggs for about 8 mins. Immediately run under cold water a couple of times till the eggs cool down. Let it rest in cold water till it comes to room temperature.
3. In a salad bowl, roughly tear the salad leaves.
4. Peel and dice both potatoes and eggs to roughly the same size. 1/2" cubes
5. Toss all ingredients with the mayonnaise till its evenly spread.
6. Check seasoning and add salt/pepper if required.
7. Chill in refrigerator till its time to be served.

I've been trying out different colour settings in my camera. Excuse the different tones. One day I'll read up that manual. Till then...
Egg & Potato Salad

Have you ever tried pounding your mayo together? I have. Not easy. Have you tried whisking your mayo together? I'm sure you have, but again a terrible bore dripping it bit by bit and whisking till it all emulsifies.
I've always read that you have to do it by hand and not a mixer cos the heat of the motor impacts the flavour. I've never been brave enough to try it though. If I'm going to be using all that oil, it better turn out right. I hate things not working out and having to throw food away. That just seems wrong in my eyes.
These days though, my aunt and everyone else (including David Lebovitz) seems to be talking about blender mayonnaise. All you have to do is use the whole egg instead of the yolk. Fair enough. With enough victories and testimonials going around, I thought I'd try it out. You could also use a hand blender, I don't own one, so I went ahead with my trusty Molinex.

Ingredients
1 whole egg
1 tbsp mustard (I squeezed it out of a bottle, you could use powdered too)
1 tsp white wine vinegar
2/3 cup refined oil (you could use half olive oil, but I feel it overpowers the whole thing)
1/2 tsp salt
1/2 tsp pepper
Method
1. Break the egg into the blender bowl
2. Add the mustard and start blending till it has mixed in.
3. Keep the mixer running and slowly drizzle in the oil a tablespoon at a time slowly while the blender works its magic
4. You'll slowly see it all thickening and building up volume.
5. Season with salt and pepper to taste.
Mayo made this way will be bulkier because of all the air whisked in, not as dense as the other techniques. The addition of the egg white also impacts the texture considerably.
PS: I've heard that a hand blender gives a completely different consistency. It's thicker and fluffier. I can't vouch for it, because, like I said, I don't own a hand blender.
DIY: Blender Mayonnaise

Oru naadan meen curry straight from my Mum's kitchen to me and then to you. Hopefully, there are no Chinese whispers going on here and I get it right enough, for you to get it right.
Every summer, back home, we'd have a deluge of mangoes coming in from our backyard, our ancestral home, our generous neighbours, friends and family. Everybody is gifting each other mangoes; ripe, unripe, the soft squishy local ones, the ones somebody's managed to wangle from a cousin who has an estate far away and decided to gift you just cos you're their favourite cousin. You'd think it happens across the country in summer, but I doubt anyone incorporates as much of mango into their daily dishes as Malayalees do. I might be wrong, but there are so many mango dishes it could just start coming out of our collective noses and ears.
Raw mango is a favourite. It makes its way into a lot of savoury gravy dishes - Meenum (Fish) Mangayum, Chemmeenum (Prawn) Mangayum, Chakkakkuru (Jackfruit seed) Manga are some of those common ones. Then there is Pazhamanga Pulissery, Manga Pacchadi, the list goes on. By now you would have figured out, if you're not from Kerala, that manga stands for mango in Malayalam.
 |
| Fish marinated for frying |
I rarely buy fish at home. One, it's difficult to get just enough for one person. Two, I've almost never ever had the time to go to the fish market. When we were kids, being served king fish, or seer fish or any one of those big fish without tiny bones were a luxury we looked forward to. Now as adults, when you eat out, all you get are those big fillets and it does get boring after a while. So when I went to the market, I was pretty sure I wanted a smaller variety of fish, something I'd love eating with my hands, picking away the tiny bones. I looked out for a variety called Kilimeen in Malayalam and Rani here in Bombay. Distinctive because of its pinkish red colour, it is extremely tasty when fried and a nightmare when made into a curry with all its tiny bones.
I definitely wanted a fish fry out of this one, but I also wanted some kind of curry. So I called my mom and asked for the recipe of a dish I loved - Meen pollichathu. A very traditional dish of fish steamed in a banana leaf. Mum suggested why not go in for this curry with mangoes using just the fish heads. That way, I'd get the crispy tender fried fish I wanted, and also the gravy. You needn't particularly use this fish for this gravy, anything in your comfort zone would do, Here the raw mango is used as the souring agent, instead of kodampuli (tamarind) which is traditionally used in fish curries, or tomatoes or vinegar.
Mum gives me recipes in ratios. So all she told me for this one, after listing the ingredients is, for 2 spoons of chilli powder, use 1/2 spoon of coriander powder. So the ratio of coriander to chilli powder is 1:4. Moving away from that would alter your life irrevocably and bring the wrath of all the mangoes in the world upon you. :P

Ingredients
2 tbsp coconut oil
6 shallots sliced
3 green chillis cut into half lengthwise
1" ginger pound into a paste
3 cloves garlic smashed
1 sprig curry leaves (divided to two)
1 small raw mango diced
2 tsp chilli pwder
1/2 tsp coriander powder
1/4 tsp turmeric powder
6 fish heads/slices of medium sized fish, cleaned
1 cup water or coconut milk(second press)
1/2 cup coconut milk (first press)
1 tsp coconut oil to drizzle on top.
Method.
1. Heat the coconut oil in an earthern ware pot/kadai.
2. Gently saute shallots, chillis, garlic & ginger till the shallots turn translucent.
3. Add half the curry leaves, mango and all the powders and stir quickly to avoid the powders burning.
4. Immediately add the fish and water to the pot and stir gently so that everything mixes in with the fish.
5. Cover and cook for 10 mins or till the fish is cooked.
6. Once the fish is cooked, add the first press coconut milk and gently simmer the gravy never letting it boil.
7. Finish it off with a drizzle of coconut oil on top and the remaining curry leaves.

Obviously I was too impatient to wait for a proper picture before attacking the fish fry.
Meenum Mangayum Chaar (Fish & Raw Mango Curry)

This is a late entry, pretty much usual in my case I guess. While the whole world, or whoever I'd subscribed to was churning out Easter recipes, before Easter, I'm one of those unique ones, who post a recipe after the occasion!!! yay!!! let's celebrate laziness. Or well, let's be better prepared for next Easter.
We usually have Hot Cross Buns on Maundy Thursday as part of our breaking the bread ritual. As Malayalees, we're supposed to make 'Indariyappam' and have it with 'Paal'. I'll explain those terms at some later point. But let's just get on with the fact that Mum always made the Paal (cardamom spiced coconut milk sweetened with jaggery, there I explained it right there) and we got the Hot Cross Buns from the bakery near our church. Most years, us laggards would reach too late to get the real big Hot Cross Buns, and we'd have to settle for a smaller one just so to continue with the ritual.
We'd have a brief Bible reading by the head of the family, which obviously is my Dad, then we'd have the symbolic representation of the Bread as the Body of Christ and the Paal (mentioned above) as the Blood of Christ. Daddy would cut the Bread, dip it into the Paal and give it out to each of us. And thus, Maundy Thursday was celebrated at home.
These days, everyone is very fussed about being authentic and most Malayalee Christians make Indariyappam at home, which is the traditional bread for Passover. But hey, it's always nice to have an alternate option which is slightly sweeter, spiced with cinnamon & raisins in a nice yeasted bun. So I make Hot Cross Buns. Just so I can dip it into my cup of sticky sweet Paal and enjoy.

I've shamelessly taken a riff off Pioneer Woman's Hot Cross Buns. I used to follow her quite a bit, a while ago, then I found that I'd gotten over her, like I'd gotten over most blogs, like you've probably gotten over Plattered. I'm always hunting for new & interesting, but when almost everything is new, you just want to take a step back and say, let's go back to the old stuff. Like the old stuff you know, when things were plain and simple and you didn't want to add that extra zest or rum soaked dried fruits in Hot Cross Buns. There is comfort in the familiar, the unexotic, the everyday food, the repetition, Sorry, I'm ranting. But the truth is, I don't follow too many blogs anymore, unless they're East Asian and written in a language I can comprehend. David Lebovitz is always exempt from any such heresy on my part. His blog, I'll always love.
Anyway, here's the recipe for Hot Cross Buns, straight from Pioneer Woman's blog. I've made very few changes to this recipe - halving the recipe, a cinnamon butter wash after baking, just very very slight alterations. Like she says, it's her Cinnamon rolls recipe, the same I use as well.
Ingredients
for the buns
1 cup milk
1/4 cup oil
1/4 cup sugar
11/4 tsp active dry yeast
2 cups all purpose flour
1/2 cup additional flour
1/4 tsp (heaping) baking powder
1/4 tsp (scant) baking soda
1 tsp salt
1/4 cup sugar
1 tsp cinnamon powder
1/2 tsp nutmeg powder
1/4 cup raisins
1 tbsp egg white
1 tbsp milk
2 tbsp melted butter
for the glaze
3 tbsp egg white
3 tbsp icing sugar + extra to thicken if required.
Method
Buns
1. Gently heat oil, milk & sugar in a saucepan till warm, but not boiling and the sugar has melted.
2. Let it rest for half an hour or bring it to lukewarm temperature.
3. Add yeast to the milk mixture and 2 cups of flour. Stir. Cover and rest the sticky mixture for 1 hour.
4. Add baking powder, baking soda, salt & 1/4 cup flour and mix. Stir till combined
5. Pulse 1/4 cup sugar, cinnamon powder and other spices and keep ready.
6. Tip dough onto a lightly floured surface. If the dough is still sticky, add the rest of the 1/4 cup flour bit by bit and incorporate till its not so sticky.
7. Roll out the dough/stretch it by hand, add 1/3 the cinnamon sugar & 1/2 the raisins and fold the dough onto itself.
8. Repeat step 7 and fold till the sugar & raisins are spread evenly. (You'll have leftover sugar)
9. Divide the dough into 12 equal parts and with floured hands roll it into a ball.
10. Stretch the tops and slightly fold in the dough at the bottom to get a smooth top.
11. Place on a slightly greased baking tray. Cover with a towel and allow it to rise in a warm place for 30 mins.
12. Make an egg wash with the egg white & milk. Gently brush the risen rolls with the egg wash
13. Preheat the oven to 200C. Bake for 20 mins or till the tops are nice and golden.
14. Mix melted butter and remaining sugar and brush on top of the rolls evenly till it get nice cinnamony glaze. Allow the rolls to cool
15. Mix egg white and icing sugar together till its a thick pipe-able consistency.
16. Pour into a piping bag/ziploc bag and snip the corner and pipe a cross on top of each bun.
Hot Cross Buns

What do you do when you wake up at 5:45 in the morning really hungry? Like so hungry you can't go back to sleep but you don't want to be standing by the stove making breakfast kind of hungry.
PS: this excludes folks who keep cereal at home and enjoy having it in the morning.
Me, on the other hand, I don't enjoy sweet stuff so much in the morning. I'd rather have idli or dosa or puttu or idiyappam or any of those nice savoury things. Toast & eggs are always welcome too! But all of the above requires being near the stove and really who wants to do that early in the morning.
Which is when you say hello to casseroles. The easiest breakfast in the world where all you need to do is shred some bread, add in some veggies of your choice, whisk a couple of eggs in milk, throw it all in a dish and bake for half an hour. If your stomach can wait for half an hour that is.
Mine does wait, cos the end product is so good and feels so indulgent while not being really indulgent at all. How could it be? All you've done is changed around toast and eggs to a casserole. Perv that I am about toast, my toast probably takes more effort on the stove than this.

To add a little more sparkle to this plain dish, I drizzle some extra virgin olive oil before baking and well, while serving. I'm extra indulgent about olive oil these days. You can use any kind of spice mixture - pepper, chilli flakes, za'atar and probably even add a chilli sauce to the custard mix if you're so inclined. I'd add sausages and other cooked meats if I feel like having a meaty casserole. There actually is no recipe for a casserole. Or atleast the kinds I make. All you need to remember is a ratio of 2 eggs to 1 cup milk. I also occasionally go for 1 egg for 3/4 cup milk, but then that takes longer to cook. Today 2 eggs to 1 cup milk works. You could also use cream instead of milk or half milk and half cream. Whatever floats your boat.

For this recipe I used a 7" x 3" baking dish. And it serves one really hungry person. It can also be stretched to two not so hungry people.
Ingredients
4 slices day old bread shredded by hand
2 handfuls baby spinach torn
1 large tomato sliced
2 eggs
1 cup milk
1 tbsp extra virgin olive oil
1/2 tsp Salt
1/2 tsp pepper
Extra EVOO & chilli flakes to serve (optional)
Method
1. Preheat oven to 200 C
2. Shred the bread and evenly distribute in a baking dish
3. Top with spinach and tomatoes. Toss around if you want it evenly distributed. I just layered them.
4. Whisk eggs, milk, salt & pepper in a bowl
5. Gently pour over the bread mix and let it spread it evenly.
6. Press down on the mix from top with a spatula and let the bread soak up the egg mix.
7. Let it rest for 5 mins (if you have patience)
8. Drizzle olive oil on top
9. Bake in oven for 30-35 mins till the egg mix has set but is slightly jiggly.
10. Slice up to a plate, drizzle with extra virgin olive oil & chilli flakes
11. Serve!
Voila! Breakfast ready.
The best part? You could also make this in advance and warm it up when it's time to eat. Wooohoooo!!!
Baby Spinach & Tomato Breakfast Casserole
Subscribe to:
Posts
(
Atom
)


